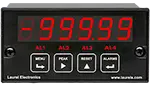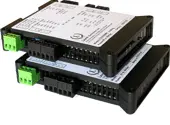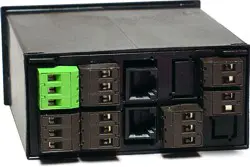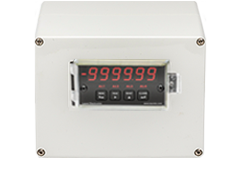
Panel Meter for Load Cell, Strain Gauge and Microvolt Applications

Panel Meter for Load Cell, Strain Gauge and Microvolt Applications

Price: $396.00
  • P/NL20000WM
- +

Features

  • 20, 50, 100, 250 & 500 mV full scale ranges, 1 microvolt sensitivity
  • Accuracy of 0.01%  of reading ± 2 counts
  • 4- or 6-wire hookup to avoid lead resistance effects
  • 10 Vdc excitation to power four 350-ohm load cells in parallel (isolated)
  • All input ranges are user selectable and factory calibrated
  • Up to 60 conversions per second, Ideal for peak or valley capture
  • Digital span adjust from 0 to ±99,999, zero adjust from -99,999 to +99,999
  • Front panel scalable to ±99,999 for use with current shunts
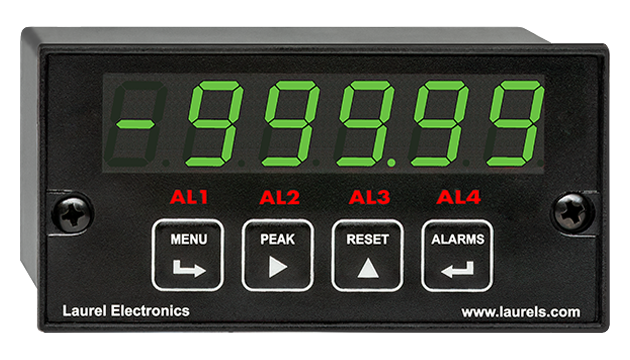
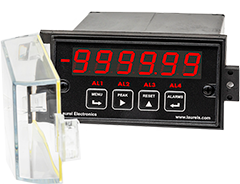
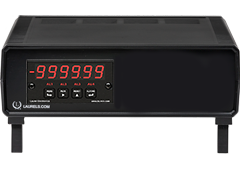
  • 1/8 DIN size with bright red or green 0.56" (14.2mm), high LED digits
  • Transducer excitation output, 5, 10, 12, or 24 Vdc (isolated)
  • Power 85-264 Vac / 90-300 Vdc or 10-48 Vdc / 12-32 Vac (isolated)
  • Operating temperature from -40°C to 70°C  (-40°F to 158°F)
  • Wide choice of Plug-in-Play options:
    - 2 or 4 relays, mechanical or solid state, for alarm or control (isolated)
    - 1 or 2 Analog output, 4-20 mA, 0-20 mA, 0-10V, or -10V to +10V (isolated)
    - Communications: Ethernet, WiFi, USB, RS232, RS485 (isolated)
    - Extended DPM allows up to 180 data points for custom curve linearization
    and a rate derived from consecutive readings

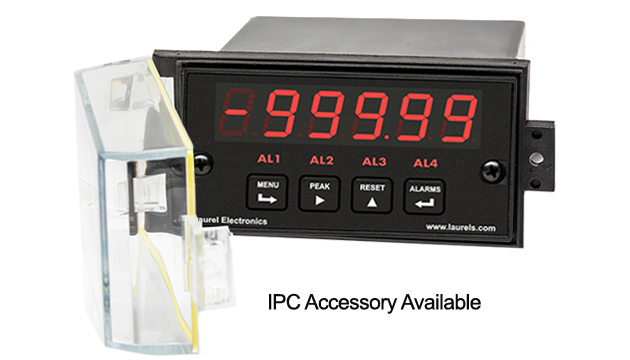
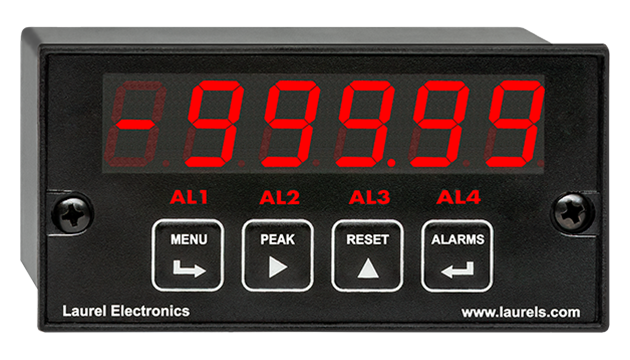
The Laureate™ 1/8 DIN Panel Meter for strain gauge load cell

 is a 5-digit panel meter with exceptionally high accuracy and stability for use with low-level signals.

  • Load cell meter operation provides sensitivity down to ±20 mV full scale for use with 2 mV/V load cells at 10V excitation. Ratiometric operation automatically compensates for changes in excitation. The 5 digit display can be scaled for direct readout in engineering units, such as pounds, kilograms or PSI. Scaling can be via front panel pushbuttons or a computer. Zero may be set from -99,999 to +99,999. Range may be scaled from 0 to ±99,999. Digital scaling and calibration eliminate drift caused by potentiometers in non-microcomputer based meters.
  • DC microvoltmeter operation provides sensitivity down to ±20.000 mV full scale with 1 µV resolution for use with 2 mV/V load cells. A display span of 99,999 counts with sensitivity of 0.2 µV per count can be obtained by applying a digital multiplier of five. A moving average digital filter assures quiet readings in electrically noisy environments.

Panel Meter accuracy in ratiometric bridge operation is 0.01%  of reading ± 2 counts. Custom curve linearization, which is available with the optional Extended main board, can extend the working range of load cells. Custom curve linearization also allows greater accuracy to be achieved with lower cost, less linear load cells.

A built-in isolated excitation supply can provide up to 120 mA of current at 10V to power four 350-ohm load cells in parallel. The panel meter operates in a ratiometric mode to eliminate errors due to supply variations. When excitation sense inputs are used in 6-wire connection, the panel meter compensates for variation in resistance of the transducer leads, thereby allowing long cable runs.

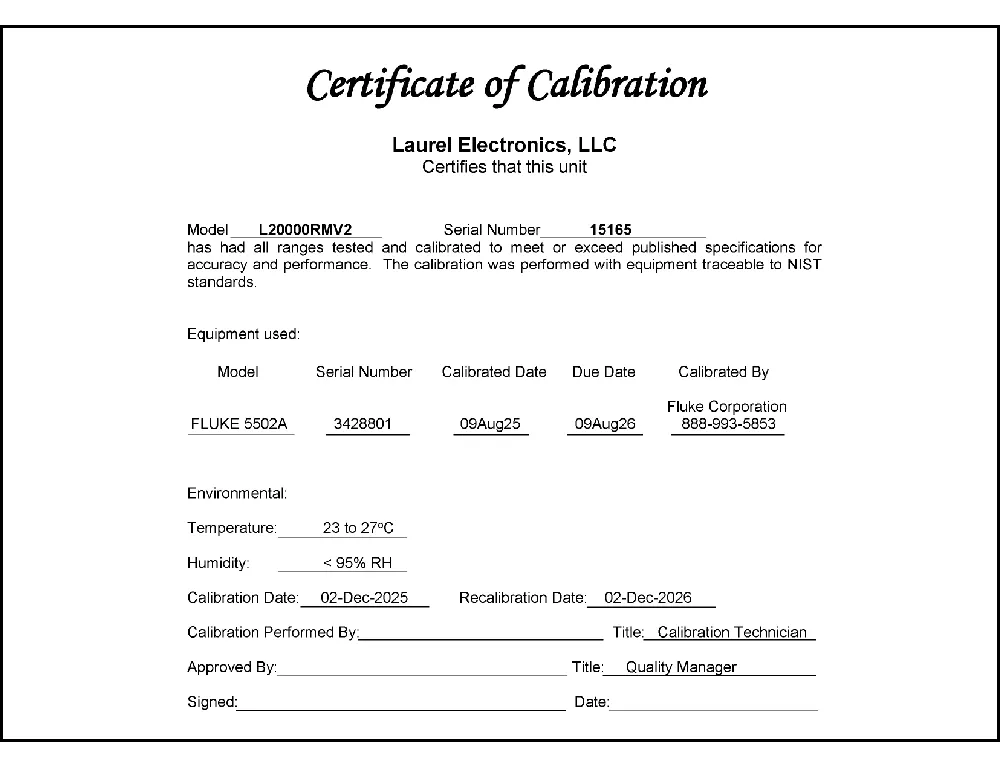
All signal conditioner board ranges are factory-calibrated, with calibration factors for each range securely stored in an onboard EEPROM. These factors can be scaled via software to accommodate external shunts, enabling field replacement of signal conditioner boards without necessitating recalibration of the associated panel meter. For optimal accuracy, factory recalibration is recommended annually. All Laurel Electronics instruments undergo factory calibration using the industry-leading Fluke calibrators, which are recalibrated yearly and certified traceable to national standards, ensuring the highest level of precision and reliability.

The optional extended Laureate computer board enhances Laureate Panel Meters by displaying rates derived from successive readings and enabling highly accurate custom curve linearization. For example, it can calculate liquid volume or flow rate in a horizontal cylindrical tank using levels from a 4-20 mA transmitter. Setup is straightforward: users input up to 180 data points into a spreadsheet or text file, and the computer calculates spline-fit segments, which are then downloaded to the panel meter for precise operation.

The Laureate Panel Meter is easily programmed with Laurel’s free Instrument Setup Software, downloadable from our website and compatible with Windows PCs, requiring a data interface board for setup.

Scaling is from -99,999 to +99,999 (five full digits) with any decimal point to display readings in engineering units, such as PSI. Three scaling methods are user selectable: scale and offset, two-point method, and system-level calibration using actual transducer signals.

High read rate of up to 50 or 60 conversions per second, the Laureate™ Panel Meter uses Concurrent Slope (US Pat. 5,262,780) analog-to-digital conversion to integrate signals over a full power line cycle (50 Hz or 60 Hz). This read rate enables peak and valley capture, real-time computer interfacing, and control applications. Peak and valley values are automatically captured and can be viewed using Laurel’s free Instrument Setup Software (compatible with Windows PCs) or transmitted as serial data.

Digital signal filtering modes can be selected to ensure stable readings in electrically noisy environments.
  • An unfiltered selection provides true peak and valley readings and aids in control applications.
  • A batch average filter selection averages each 16 conversions.
  • An adaptive moving average filter selection provides a choice of 8 time constants from 80 ms to 9.6 seconds. When a significant change in signal level occurs, the filter adapts by briefly switching to the shortest time to follow the change, then reverts back to its selected time constant. An Auto setting selects the time constant selection based on signal noise.

Scale and offset can be provided by either of two user-selectable methods:

  • With the coordinate reading method, the panel meter reads the high and low signal values, and the user enters the desired high an low reading values. The panel meter then calculates the span multiplier and offset. This method is ideal if an external calibration reference is available.
  • With the manual coordinate method, the user enters the high and low input values in Volts plus the desired high and low reading values. This method is suitable if no external calibration reference is available.

Two tare functions: auto-tare and manual tare. In auto-tare, an input line is grounded by an external pushbutton. This causes the current weight, which is normally the empty weight of the container to be stored in memory as an offset. In manual tare, the tare value can be entered manually via the front panel or a computer using Laurel's free Instrument Setup Software. For instance, the tare value may be the stated empty weight of a truck or rail car. Pressing the Reset button on the front panel toggles the display between gross weight (total weight on the scale) and net weight (gross weight with tare subtracted). 

Peak and valley values are automatically captured. These may be displayed via a front panel pushbutton command or control signal at the rear connector, or be transmitted as serial data.

Two rear panel control Inputs (CMOS/TTL levels, logic 0 = tied to digital ground, logic 1 = open) or dry contacts that can be set to control / activate 14 meter commands.

An (isolated) 5, 10, 12, or 24 Vdc excitation output is standard to power transducers or two-wire transmitters. Ratiometric operation, which automatically compensates for changes in the applied excitation, is jumper selectable for applications, such as bridges, where the signal to be measured is proportional to the excitation level.
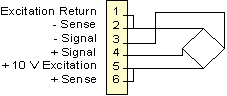
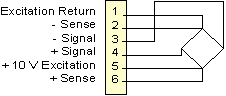
Load Cell Meter Connections

Load Cell Meter Connections 4 wire
In 4-wire connection, the excitation and sense lines are tied together. The panel meter can make ratiometric corrections for supply voltage variations, but not compensate for variations in lead resistance. This connection is often used with short cable runs.
Load Cell Meter Connections 6 wire
In 6-wire connection, the sense lines are separate from the excitation lines, thereby eliminating effects due to variations in lead resistance. This allows long cable runs in outdoor environments with temperature extremes.
Load Cell Meter Connections for Large Scales
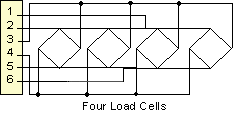
For large scales, up to four 350 ohm load cells can be powered by a single Laureate, whose excitation output is rated 120 mA at 10V. The excitation and sense points of the four bridges are connected in parallel. The load cell outputs will be averaged if the load cells have the same sensitivity in mV/V.
Seat belt tensile strength testing using Laureate digital panel meters.

Seat belt tensile strength testing using a Laureate panel meter.
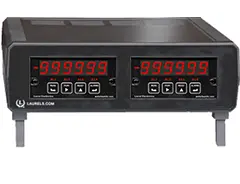
The three meters display Force, Displacement and Speed.

Load Cell Inputs and DC Microvoltmeter Inputs

Input Range mV Resolution Input Resistance Error at 25°C
±20.000 1 µV 1 GΩ ±0.01% of full scale
±2 counts
±50.000 1 µV
±100.00 10 µV
±250.00 10 µV
±500.00 10 µV
Full-Scale Input, mV Zero Adjust Span Adjust Input Resistance Error at 25°C
±20.00 0 to ±99,999 1 GΩ ±0.01% of reading
±2 counts
±50.00 -99,999
±100.00 to
±250.00 +99,999
±500.00
Recalibration: All ranges are calibrated at the factory. Recalibration is recommended every 12 months.
Accuracy
Error at 25°C ±0.01% of reading ± 2 counts in ratiometric mode,
±0.01% of full scale ± 2 counts in absolute mode.
Span tempco 0.0015% of reading/°C
Zero tempco 0.1 µV/°C
Load cell linearization Programmable using Extended meter version
Noise Rejection
CMR, DC to 60 Hz 130 dB
NMR at 50/60 Hz 90 dB with min filtering
A-to-D Conversion
Technique Concurrent Slope™ (Pat 5,262,780)
A-to-D rate 60/s at 60 Hz, 50/s at 50 Hz
Output update rate 56/s at 60 Hz, 47/s at 50 Hz
Display update rate 3.5/s at 60 Hz, 3/s at 50 Hz
Display
Readout 5 LED digits, 7-segment, 14.2 mm (.56"), red or green
Range -99999 to 99999 or -99990 to 99990 (count by 10)
Indicators Minus sign, 2 red LED lamps
Power Supply Boards (one required)
Voltage, standard 85-264 Vac or 90-300 Vdc
Voltage, optional 12-32 Vac or 10-48 Vdc
Frequency DC or 47-63 Hz
Power  consumption (typ. with four 350Ω load cells at 10V) 2.4W @ 120 Vac, 2.7W @ 240 Vac, 2.5W @ 10 Vdc, 2.6W @ 20 Vdc, 2.75W @ 30 Vdc, 3.0W @ 40 Vdc, 3.35W @ 48 Vdc
Power Isolation 250V rms working, 2.3 kV rms per 1 min test
Excitation Output (standard)
5 Vdc 5 Vdc ± 5%, 100 mA (jumper selectable)
10 Vdc 10 Vdc ± 5%, 120 mA (jumper selectable)
12 Vdc 12 Vdc ± 5%, 100 mA (jumper selectable)
24 Vdc 24 Vdc ± 5%, 50 mA (jumper selectable)
Output Isolation 50 Vdc from signal ground
Ratiometric operation Automatically compensates for changes in excitation level.
Analog Output Board (one optional)
Output levels 4-20 mA, 0-20 mA, 0-10V, -10 to +10V (jumper selectable)
Current compliance 20 mA at 10V ( > 5 kΩ load)
Voltage compliance 12V at 20 mA (< 600 Ω load)
Scaling Zero and full scale adjustable from -99999 to +99999
Resolution 16 bits (0.0015% of full scale)
Isolation 250V rms working, 2.3 kV rms per 1 min test
Relay Output Boards (one optional)
Dual magnetic relays 2 Form C, 10A max, 440Vac or 125Vdc max, 2500VA or 300W
Quad magnetic relays 4 Form A (NO), 10A max, 440Vac or 125Vdc max, 2500VA or 300W
Dual solid state relays 2 Form A (NO), AC or DC, 0V - 400V, 120Ma, 35Ohms (max at On-State)
Quad solid state relays 4 Form A (NO), AC or DC, 0V - 400V, 120Ma, 35Ohms (max at On-State)
Relay commons Isolated commons for dual relays or each pair of quad relays
Relay isolation 250V rms working, 2.3 kV rms per 1 minute test
Relay latching modes Latching or non-latching
Relay active modes Active on or off, active high or low
Hysteresis modes QA passband mode, split hysteresis, span hysteresis
Communication Boards (one optional)
Board selections RS232RS485 with dual RJ11 connectors, RS485 with dual RJ45 connectors, USB, Ethernet, USB-to-RS485 gatewayEthernet-to-RS485 gateway, WiFi with built-in antenna plus USB & RS485, WiFi with external antenna plus USB & RS485
Protocols Laurel Custom ASCII (serial), Modbus RTU (serial), Modbus TCP (Ethernet or WiFi)
Digital addresses 247 (Modbus), 31 (Laurel ASCII),
Isolation 250V rms working, 2.3 kV rms per 1 min test
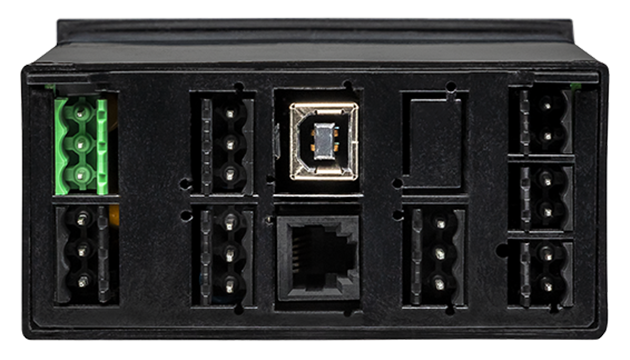
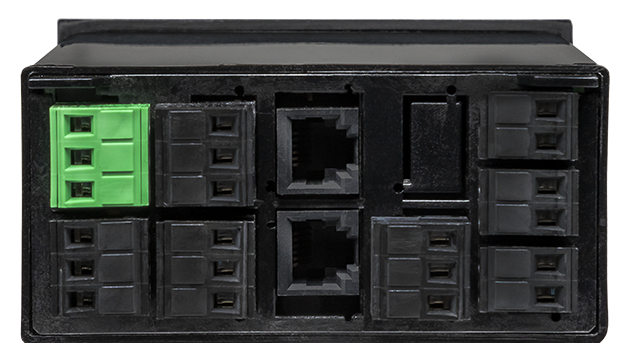
Signal Connections
Signal Conditioning
Environmental
Operating temperature -40°C to 70°C (-40°F to 158°F)
Storage temperature. -40°C to 85°C (-40°F to 185°F)
Relative humidity 95% at 40°C, non-condensing
Protection NEMA-4X (IP-65) when panel mounted
Mechanical
Enclosure 1/8 DIN, high impact plastic, UL 94V-0, color: black
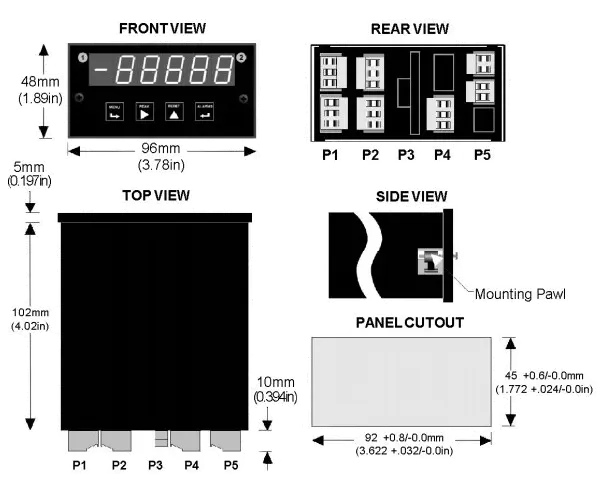
Mounting 1/8 DIN panel cutout required: 3.622" x 1.772" (92 mm x 45 mm).
Dimensions 4.68" x 2.45" x 5.64" (119 mm x 62 mm x 143 mm) (W x H x D)
Maximum panel thickness 4.5 mm (0.18")
Tightening Torque - Connectors Screw terminal connectors: 5 lb-in (0.56 Nm)
Tightening Torque - Pawls Digital Panel Meter Case Pawls: 5 lb-in (0.56 Nm)
Weight of base meter 210 g (7.4 oz) typical (DPM, counter, timer, 6-digit remote display)
Weight of option boards 30 g (1.0 oz) typical per board (analog output, relay output, communications)
General
Programming Methods Four front panel buttons or via Laurel's free Instrument Setup Software, which runs on a PC under MS Windows. 
Security Lockout options include using the front panel buttons, the free Instrument Setup Software, or a hardware jumper.
Warranty 3 years parts & labor
Recalibration: All ranges are calibrated at the factory. Recalibration is recommended every 12 months.

Free Instrument Setup Software for Series 2 Laureates

Digital Panel Meter Laurel Electronics Digital Transmitters
1/8 DIN Digital Panel Meters DIN Rail Transmitters

Free Downloadable Windows-based Instrument Setup (IS) software (Data Interface Board Required) for use with our programmable Digital Panel Meters, Scale Meters, Counters, Timers, Remote Displays, and Transmitters, are an easy method to set up Laureate 1/8 DIN digital panel meters, counters, timers, remote displays, and DIN-rail transmitters, as explained in the Instrument Setup Software Manual. Laureate 1/8 DIN instruments can also be set up from the front panel, as explained in their respective Owners Manuals. Instrument Setup software is of benefit whether or not the PC is connected to the instrument.

  • When the PC is connected to the instrument, Instrument Setup software can retrieve the setup file from the instrument or open a default setup file or previously saved setup file from disk View Setup, then provides graphical user interface (GUI) screens with pull-down menus applicable to input, display, scaling, filtering, alarms, communications, analog output, and front panel lockouts. Fields that are not applicable to the instrument as configured are either left out or grayed out. Clicking on any item will bring up a detailed Help screen for that item. After editing, the setup file can be downloaded, uploaded to the instrument, or saved to a disk. The same setup file can then be downloaded into multiple instruments.
  • When the PC is not connected to the instrument, the above GUI screens can be used to set up a virtual instrument. The setup file can then be saved to disk. Switching toView Menu then brings up a screen with the required front panel programming steps. This view can be printed out for use at the instrument site and to serve as a hard copy record.

    Download Free Instrument Setup Software


Installation

Set User Account Control (UAC) of MS Windows to "Never notifiy me" so that Instrument Setup Software can create directories. The UAC change screen can be reached as follows:
  • Under Windows 7, click on the Windows Start button in the lower left of the desktop and enter "UAC" in the search field.
  • Under Windows 8, navigate to Control Panel, then to the "User Accounts and Family Safety" section, and click on "Change User Account Control Settings."
  • Under Windows 10, click on the Windows Start button in the lower left of the desktop, then on "Settings", and enter "UAC" in the search field.
  • Reboot your computer for the changed UAC setting to take effect.
Meter board with USB Type-B connector

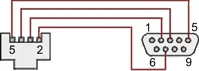
RJ11-to-DB9 cable with rear view of DB9 connector to PC
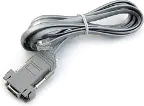
Laurel USB cable, P/N CBL05

RS232 cable, meter to PC, P/N CBL01

Laureate 1/8 DIN Laureate instruments must be equipped with a serial communications board and be connected to the computer via a serial communications cable. The connection can be via RS232, RS485, USB or Ethernet. Following setup, the serial communications board may be removed from the instrument if desired. The wiring of the RS232 cable is illustrated above with end views of the two connectors.

Laureate LT Series transmitters come standard with a 3-wire serial interface, which can be jumpered for RS232 or RS485.
Laureate LTE Series transmitters come standard with an Ethernet interface.

Meter Setup Screens

Click on any of the reduced screens below for a full-size screen view, then click on the Back button of your browser to return to this page. The screens examples below are for a fully-loaded Series 2 Digital Panel Meter (DPM), which is connected to the PC via RS232. If the meter is a Series 1 meter (pre-2007), this is sensed by the software, and somewhat different screens are brought up. Please see Series 1 setup screens.

Laurel Dual Channel Pulse Input Rate Meter
Welcome Screen
From the computer desktop, click on Start > Programs > IS2 > IS2. Or click on the IS icon on your desktop. This splash screen will be displayed for three seconds. The software revision number is in the lower right.
more
Setup Screen 02s for Digital Panel Meters and Digital Transmitters
Communications Selection Screen
Specify your desired communication protocol and the serial communications bus type, which should match the jumper setup of the instrument. Select None if the PC is not connected to the instrument.
more
Setup Screen 3 for Digital Panel Meters and Digital Transmitters
Establish Communications Screen
If you selected RS-232, you will be asked to specify the PC Com Port and Baud Rate, which should match the jumper setup of the instrument. Click on Establish. With the right settings, the Communications Established field will light up in green, and the Meter Type will be recognized. If so, click onMain Menu.
more
Setup Screen 4 for Digital Panel Meters and Digital Transmitters
Main Menu Screen
Click on File > Default Setup to retrieve the default setup file from disk for your type of meter. Click on File > Open Setupto retrieve a previously saved setup file from disk or on File > Save Setup to save your edited setup file to disk. Click onDPM > Get Setup to retrieve the setup file from your meter or on DPM > Put Setup to download your edited setup file into the meter.
more
Setup Screen 5 for Digital Panel Meters and Digital Transmitters
DPM Input + Display Setup Screen
From the Main Menu, click on View > Setup, then on theInput+Display tab. You can now specify the meter hardware, signal type, display mode, and functions of control inputs A and B. Clicking on any item brings up a pull-down menu with the available choices.
more
Setup Screen 6 for Digital Panel Meters and Digital Transmitters
DPM Scaling Setup Screen
Click on the Scaling tab, which provides three scaling methods to relate the signal to the displayed reading: 1) Scale and Offset method, 2) Coordinates of two points method, and 3) Reading Coordinates of Two Points method. The last method uses actual high and low signals, and the computer will prompt you.
more
Setup Screen 7 for Digital Panel Meters and Digital Transmitters
DPM Filter Setup Screen
Click on the Filter tab, which allows you to specify the digital filter time constant (if any), the adaptive filter threshold, and whether Peak / Valley values are filtered or unfiltered. As for all setup screens, clicking on the F1 key while an item is highlighted brings up a Help screen for that item, as illustrated.
more
Setup Screen 8 for Digital Panel Meters and Digital Transmitters
DPM Relay Alarms Setup Screen
Click on the Relay Alarms tab, which allows you to set up Alarms 1 and 2 for the optional dual relay output board. Clicking on any of the four numeric fields changes these to green and brings up a special field to enter the desired numeric value, which is tied to the displayed reading.
more
Setup Screen 9 for Digital Panel Meters and Digital Transmitters
DPM Communications Setup Screen
Click on the Communications tab so set up serial communications. In particular, you can special the Serial Protocol and the meter address if multiple meters are to be addressed on the same serial data line.
more
Setup Screen 10 for Digital Panel Meters and Digital Transmitters
DPM Analog Output Setup Screen
Click on the Analog Out tab so set up the optional analog output board. Three output ranges are selectable, the endpoints of which can be tied to user-specified High and Low readings.
more
Setup Screen 11 for Digital Panel Meters and Digital Transmitters
DPM Lockouts Setup Screen
Click on the Lockouts tab to check off menu items which will no longer be accessible from the front panel of the meter. This will simplify meter operation and prevent unintended setup changes.
more

Meter Setup Utilities

Setup Screen 12 for Digital Panel Meters and Digital Transmitters
DPM Front Panel Setup Screen
As an aid to programming the meter from the front panel when a serial connection is not available, you can return to the Main Menu and click on View > Menu. The required sequence of front panel screens will then be displayed. Click on any step in the sequence for the meaning of each digit, as illustrated for the FILtEr step. For a hardcopy, simply press on Print.
more
Setup Screen 13 for Digital Panel Meters and Digital Transmitters
DPM Jumper Setup Screen
Specify your desired communication protocol and the serial communications bus type, which should match the jumper setup of the instrument. Select None if the PC is not connected to the instrument.
more
Setup Screen 14 for Digital Panel Meters and Digital Transmitters
DPM Jumper Setup Screens
Click on any of the displayed plug-in boards, and you will be presented with the jumper positions and electrical connections for your selected board. This minimizes the need to refer to the printed manual.
more
Setup Screen 15 for Digital Panel Meters and Digital Transmitters
DPM Commands Screen
This page allows you set up external input, serial communications, an analog output proportional to the display (optional), and lockouts for Laureate digital counters. The grayed out area at the top right of the screen applies to Laureate remote displays.
more
Graphical Output Screens (not available with Ethernet)

From the Main Menu, click on Readings if your PC is connected to the meter. A pull-down menu then offers three choices: ListPlot and Graph.

  • List presents the latest readings in a 20-row by 10-column table. Press Pause at any time to freeze the display. This is one method to capture peak readings.   
  • Plot generates a plot of readings vs. time in seconds. It effectively turns the DPM-PC combination into a printing digital oscilloscope.
    more 
  • Graph generates a histogram where the horizontal axis is the reading and the vertical axis is the number of occurrences of readings. The display continually resizes itself as the number of readings increases.
    more
Setup Screen 18 for Digital Panel Meters and Digital Transmitters
DPM Calibration Screens
Click on the Scaling tab, which provides three scalClick on the Scaling tab, which provides three scaling methods to relate the signal to the displayed reading: 1) Scale and Offset method, 2) Coordinates of two points method, and 3) Reading Coordinates of Two Points method. The last method uses actual high and low signals, and the computer will prompt you.
more
Setup Screen 19 for Digital Panel Meters and Digital Transmitters
Frequency Meter Calibration Screen
Calibration of the quartz crystal of the Laureate frequency meter requires the input of a known frequency from a calibrator. Apply the frequency, then enter the frequency in Hertz. Calibration will be automatic, with storage of the calibration factor stored in non-volatile memory.
more


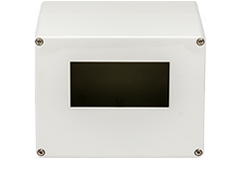
Laureate™ 1/8 DIN Case For Laureate Digital Panel Meters, Counters, Timers & Remote Displays

Laurel panel meter case

Key Features

  • Meets 1/8 DIN Standard.
  • Installs from front of panel.
  • Short depth behind the panel: only 4" (102 mm) plus connectors.
  • Understated 0.157" (4 mm) thick bezel.
  • Meets NEMA 4X (IP-65) for high-pressure wawshdon when panel mounted.
  • Screw clamps connectors meet VDE / IEC / UL / CSA safety standards.
  • Rugged GE Lexan® housing material.
  • Safety certified per EN 61010-1.
CE CertifiedRoHs CertifiedETL Certified

Dimensions

Mechanical specifications of Laureate digital panel meters and electronic counters

Maximum panel thickness: 4.5 mm (0.18")
Weight of base meter:
210 g (7.4 oz) typical (DPM, counter, timer, 6-digit remote display)
Weight of option boards: 30 g (1.0 oz) typical per board (analog output, relay output, communications)
Tightening Torque - Connectors: Screw terminal connectors: 5 lb-in (0.56 Nm)
Tightening Torque - Pawls: Digital Panel Meter Case Pawls: 5 lb-in (0.56 Nm)
Dimensioned CAD assembly drawings in EPRT, STEP, x_t. dwg, pdf file formats: Laureate-meter-case.zip (zipping prevents browser from opening CAD files as text files).

Panel Mounting

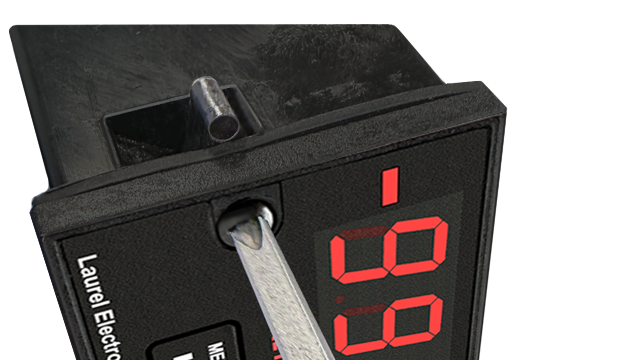
Mechanical Panel Mounting GuideSlide the meter into a 45 x 92 mm 1/8 DIN panel cutout. Ensure that the provided gasket is in place between the front of the panel and the back of the meter bezel. The meter is secured by two pawls, each held by a screw, as illustrated. Turning each screw counterclockwise extends the pawl outward from the case and behind the panel. Turning each screw clockwise further tightens it against the panel to secure the meter.

Turning each screw counterclockwise loosens the pawl and retracts it into its well. This position allows installed meter to be removed from their panel, or new meters to be installed in a panel. Do not remove the screws from their pawls. Doing so would cause the screw and pawl to fall off and likely get lost. Do not overtighten so as not to damage the plastic parts.
 

Load Cell Meter Frequently Asked Technical Questions

Yes, they do. The Signal inputs of the load cell meter must receive the millivolt signal outputs of the load cell. At 10V excitation, these can range from -20 mV to +20 mV for a 2 mV/V load cell or -30 mV to +30 mV for a 3 mV/V load cell. The Signal is what is converted by the meter into a reading in engineering units like pounds or PSI. The Sense inputs of the meter must sense the excitation voltage, which is also used as the reference for the meter's analog-to-digital converter. With a 6-wire load cell connection, the excitation voltage should be sensed at the load cell after any voltage drop due to resistance of the excitation leads. With a 4-wire load cell connection, the excitation voltage can be sensed at the meter by connecting +Sense to +Excitation and -Sense to -Excitation, but the sensed voltage will then higher than the actual voltage applied to the load cell.
Load cell meter scaling is the process of converting input millivolts to a reading in engineering units. For example, meter scaling is the process of converting the 0-20.000 mV DC output of a load cell to a 0-5000 lb weight reading on the meter.
A count is a unit of resolution. For the Laureate ±20.000 mV and ±50.000 mV ranges, each input count is 0.001 mV (or 1 microvolt) of resolution. For example, 17.354 mV is 17354 input counts. Display counts are the values to be displayed as readings. For example, a reading of 2465.7 lbs is 24657 display counts. The decimal point is set separately as a decoration.
Simply enter data from the load cell label. For example, the label may state 10V excitation, a load rating of 5000 lbs, and 2.020 mV per volt sensitivity. This means 0 mV should be displayed as 0 lbs, and 20.20 mV should be displayed as 5000. To enter this data into the meter, go to the front panel menu item “SEtuP” and select “Coordinates of 2 points method.” Enter Lo In as 0.000 mV, Hi In as 20.200 mV, Lo Read as 0 lbs, and Hi Read as 5000 lbs.
First zero the scale and meter as a system by not applying any weight, then weigh a known, calibrated weight and enter that value into the meter. To do so, go to the front panel menu item “SEtuP” and select “Reading coordinates of 2 points method.” The meter will then prompt you to measure Lo In and High In, and to enter values for Lo Read and High Read.
The ordering process for a Laureate load cell / microvolt meter requires that min input, min reading and max input, max reading be specified at the time of order. This information allows Laurel to set the meter range, which can be ±20.000 mV, ±50.000 mV, ±100.00 mV, ±250.00 mV, or ±500.00 mV, and to scale the meter using the coordinates of 2 points method. This initial setup can easily be changed by the user by moving jumpers and changing scaling via the meter’s front panel, as explained in Section 19 of the Laureate DPM user manual.
The + and - signal inputs measure the millivolt output of the load cell, while the + and - sense inputs measure the excitation voltage that is applied to the load cell. The sensed voltage is used as the reference to the meter’s analog-to-digital converter. If possible, the excitation voltage should be sensed at the load cell, not at the meter, so that it is measured after any voltage drop through the excitation wires. If these wires are long, this voltage drop can be substantial. For example, if the excitation and excitation return wires each have a resistance of 1 ohm, the voltage drop will be V = IR = (10V / 350 ohm) * 2 ohm = 0.057V, so that the actual voltage applied to the load cell is 10V – 0.057V = 9.94V.
Laureate load cell meters are modular with slots for an analog output board, a choice of relay boards, and a choice of communication boards, as illustrated in our Laureates Overview web page. These boards can be ordered installed with a new meter, but they can also be purchased separately later and be simply plugged in. The presence of a new board and the type of board are automatically sensed by the meter’s firmware or by  Instrument Setup (IS) software. If you change boards, also change the model number on the meter label.
The Laureate load cell meter offers resolution down to 1 microvolt per count, while the Laureate process meter is limited to 10 microvolts per count. The load cell meter can also be set up for a 6-wire connection, while the process meter is limited to 4 wires. The extra 2 wires are used to eliminate errors due to voltage drops in long cable runs. Both types of meters can be used with the same types of load cells and can scale millivolt signals for display in engineering units. The slightly more expensive load cell meter is recommended for more demanding applications.
The Laureate load cell meter and microvolt meter are the same meter, but they are set up differently. In load cell mode, the meter works in a ratiometric bridge mode, where the applied voltage excitation is also used as the reference for the analog-to-digital converter. This automatically corrects for any variations in excitation voltage. In microvolt meter mode, the meter is calibrated to NIST standards for absolute readings in millivolts or microvolts.
The hardware of the load cell meter and scale meter is the same, but the meter firmware is slightly different, as detailed in the Scale Meter for Weighing Applications web page. Compared to the standard load cell meter, the scale meter offers five extra user selectable functions specifically for weighing applications:
1) Relay setpoint offset,
2) Count-by function,
3) Fixed right-hand dummy zero,
4) Auto-zero function,
5) Manual tare function.
Yes. A summing box is simply a clean way to connect the meter to the 6 wires of multiple load cells in parallel. Up to four linear load cells of the same type can be connected in parallel and be powered by the same 10 Vdc, 120 mA excitation output of a Laureate meter. For example, four load cells can be used to support the four corners of a weighing platform. Each 350 ohm load cell will draw an I=V/R current of 28.6 mA, so that the total current requiremet for four load cells is 114.4 mA. For scaling purposes, multiply the weight read by each load cell by the number of load cells, since each load cell only carries part of the load. The best way scale a system with multiple load cells is to use the "Reading Coordinates of 2 Points" scaling method, which uses actual weights.
Input calibration is the process of adjusting the load cell /microvolt meter in software so that absolute readings in millivolts or microvolts are within specified tolerances of a recognized national standard. Input calibration is required for microvolt meter mode and for load cell meter setup using the scale and offset scaling method or the coordinates of 2 points scaling method. Input calibration is not required for the reading coordinates of 2 points scaling methods, which uses actual weights for calibration, not known electrical signals. Note that the Laureate load cell / microvolt meter comes with five factory calibrated voltage ranges with calibration factors stored in EEPROM on the load cell signal conditioner board: ±20.000 mV, ±50.000 mV, ±100.00 mV, ±250.00 mV, ±500.00 mV.
Annual calibration to NIST standards can be performed by Laurel and by some of its distributors as a service. It can also be performed by the customer using Laurel’s free Windows based  Instrument Setup (IS) software. Open the Main Menu of IS software, click on Calibration in the top menu bar, and follow the prompts. An external DC voltage standard is required. Also required in the meter is a communications board, like the Laureate P/N LUSB USB interface board. Following calibration, that board can be removed and be used in another meter.
Analog output scaling is the process of converting the meter reading to an analog output, which can be user selected as 4-20 mA, 0-20 mA, 0-10V or -10 to +10V. Simply enter the load cell meter readings for the bottom and tops of the selected analog output range, and the output will be interpolated linearly between these two readings. Please see Section 17 of the Laureate DPM user manual.
Chances are that your meter is set for the factory default analog output, which is 4-20 mA, and is applying around 12V to force a current into an open circuit. To set your meter to a 0-10V or -10 to +10V analog output, set jumpers for unipolar 0-10V or bipolar -10 to +10V operation, select the desired range and scaling, and connect to the correct analog output pins, as explained in Section 17 of the Laureate DPM user manual.


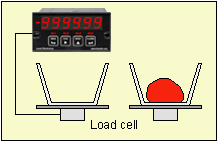
Auto Tare the weight of an object
Auto-Tare
To read the net weight of an object, the empty container is first weighed, and an external button is pushed to zero out the display. The meter will then read net weight when an object is added to the empty container. The tare value is stored in memory for subsequent readings.
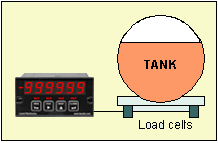
Determining Volume Using Load Cells
An easy way to determine volume of an irregularly shaped tank with no need for linearizing is to weigh the tank using load cells. The meter will automatically tare out the weight of the empty tank and then scale the load cell signals to units of volume, such as liters or gallons.
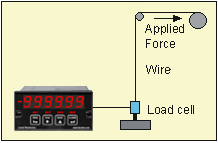
Capture for Tensile Strength of Wire
Peak readings are automatically captured at rates up to 60 per second, while the display updates at a legible 3.5 per second. The peak reading can be recalled at the push of a button or be always displayed. It can also be transmitted to a computer via RS232, RS485, USB or Ethernet.


CAL-Analog

Certificate of Calibration

$65.00

DLS-XLOG2

XLog2 Data logging Software

$495.00

IPC

Splashproof Cover

$55.00

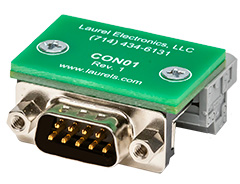
CON01

CON01 Connector

$75.00

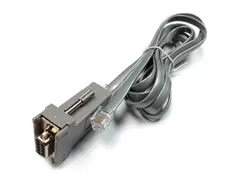
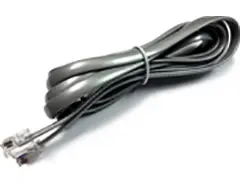
CBL01

RS232 Cable for Meters

$35.00

CBL02

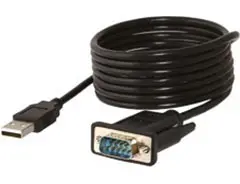
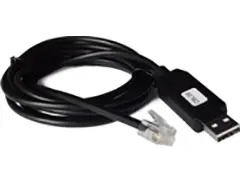
USB-to-RS232 Adapter Cable

$47.00

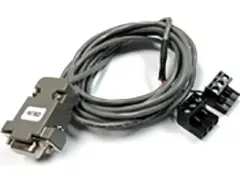
CBL04

RS232 Cable for LT Transmitters

$47.00

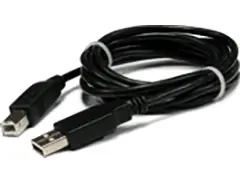
CBL05

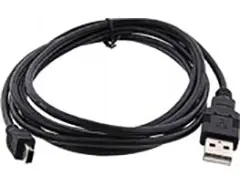
USB Data Cable for Meters

$47.00

CBL06

USB-to-RS485 Adapter Cable

$47.00

CBL07

USB Programming & Data Cable

$47.00

CBL08

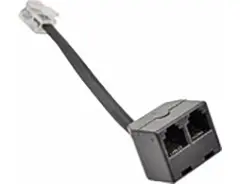
RS485 Splitter Cable

$33.00

CBL6

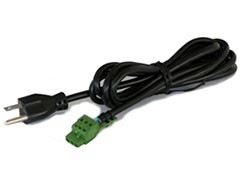
6-foot Power Cable

$41.00

CBL12

12-foot Power Cable

$47.00

Modular Design for Maximum Flexibility at Minimum Cost

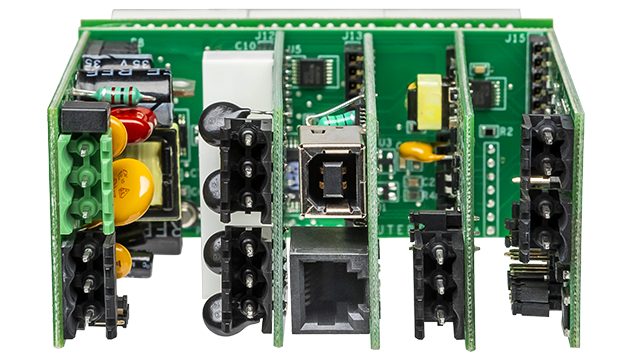
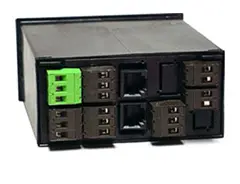
All boards are isolated from meter and power grounds. Optional Plug-in-Play boards for communications and control include Ethernet, WiFi, serial communication boardsdual or quad relay boards, and an analog output board. Laureates may be powered from 85-264 Vac or optionally from 12-32 Vac or 10-48 Vdc. The display is available with bright red or green 0.56" (14.2mm) high LED digits. The 1/8 DIN case meets NEMA 4X (IP65) specifications from the front when panel mounted. Any setup functions and front panel keys can be locked out for simplified usage and security. A built-in 5, 10, 12, or 24 Vdc excitation supply can power transducers, eliminating the need for an external power supply. All power and signal connections are via UL / VDE / CSA rated screw clamp plugs.
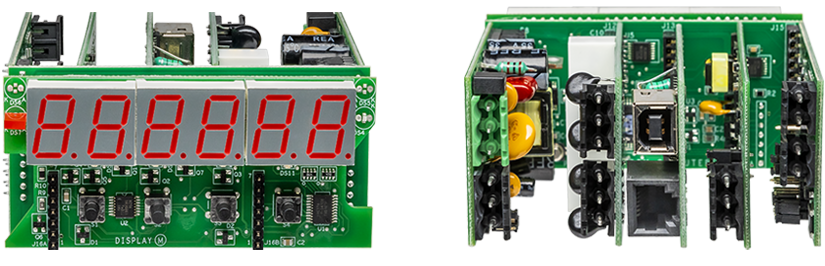
The Laureate™ Series features modular design with up to 7 isolated plug-in boards, applicable to all Laureate 1/8 DIN Panel Meter.

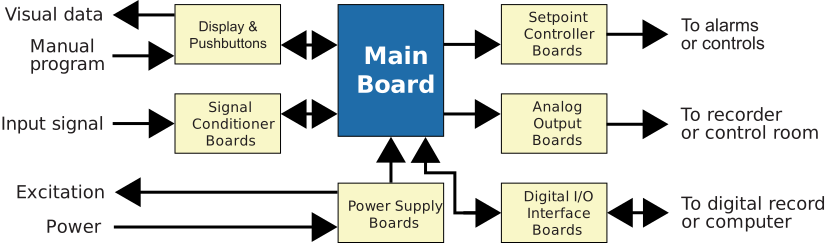
Schematic for Digital Panel Meter

Modular Hardware

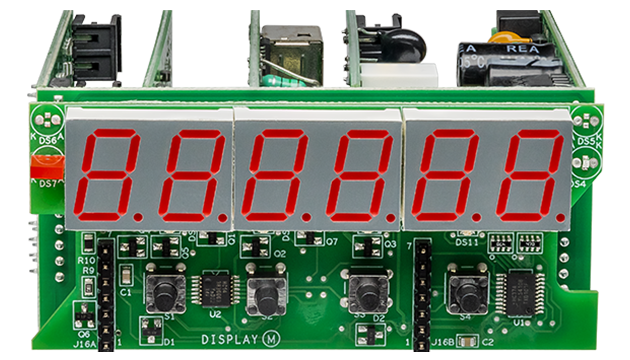
The design of the Laureate™ Series is modular for maximum flexibility at minimum cost. All boards are isolated from meter and power grounds. The base configuration for a panel meter or counter consists of a main module (with computer and plug-in display boards), a power supply board, and a signal conditioner board. Optional plug-in-play boards include an isolated setpoint controller board, an isolated analog output board, and an isolated digital interface board. Modular design and a choice of plug-in options allow the Laureate to be customized for a broad range of applications from simple monitoring to control and computer interface. There can be up to five plug-in boards in a 1/8 DIN Laureate.
Dual Board sets

Connecting Laureate Panel Meter to a Local Area Network (LAN)

Up to 30 Laureate Panel Meter and/or LT Transmitters can be configured for RS485 and daisy-chained to an LT Transmitter using Laurel’s High Speed Ethernet-to-RS485 converter board for seamless LAN integration. Alternatively, Laurel LTE series Ethernet transmitters can connect directly to a LAN via an Ethernet cable. Setup for both configurations is streamlined using Laurel’s free Instrument Setup Software, which simplifies node discovery and transmitter configuration.

Flexible Communication Options for Panel Meter

The Laureate Panel Meter can be equipped with Laurel communication boards to support various interfaces and protocols. These include serial interfaces with ASCII or Modbus RTU protocols, and Ethernet interfaces with web access, ASCII, or Modbus TCP/IP protocols, ensuring versatile connectivity for your commercial applications.
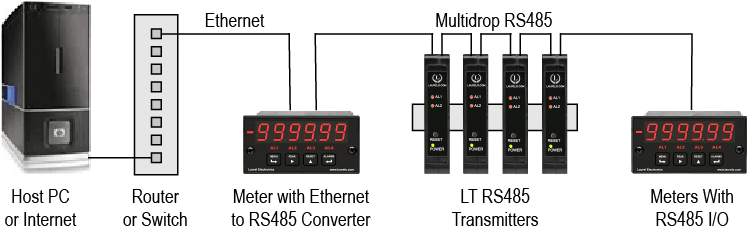
Laurel network with Ethernet-to-analog converter board

Ordering Guide
Part Number as Configured: L20000WM
Price as Configured: $396.00

Click on the Option Board Links for More Product Information

Base Item
$157.00
Display Color
$0.00
$0.00
$33.00
$33.00
Power (Isolated) $75.00
$115.00
Relay Output (Isolated)
$0.00
$101.00
$70.00
$128.00
$96.00
Analog Output (Isolated)
$0.00
$115.00
Data Interface (Isolated)
$0.00
$81.00
$109.00
$135.00
$81.00
$135.00
$237.00
$259.00
$182.00
$204.00
$171.00
$193.00
$204.00
$226.00
Signal Input (Isolated)
$164.00
$239.00
Part Number as Configured:
L20000WM
Price as Configured:
$396.00
Quantity:
- +
Extended Price:
$396.00

What Is a 1/8 DIN Panel Meter for Load Cell, Strain Gauge, and Microvolt Measurements?

In the world of precision measurement and data acquisition, a 1/8 DIN Panel Meter is a critical instrument used for displaying and monitoring various types of electrical signals. Specifically designed to interface with load cells, strain gauges, and measurements in the microvolt range, this device is indispensable in industrial, laboratory, and scientific applications.

Understanding the 1/8 DIN Panel Meter

The term "1/8 DIN" refers to the size of the Panel Meter, which is standardized to fit in a panel cutout that is 1/8th the size of a standard DIN (Deutsches Institut für Normung) enclosure. This compact size makes it an excellent choice for applications where space is limited but precise measurements are essential.

A Panel Meter of this size is designed for ease of use and accuracy. It converts analog signals from various sensors into a readable digital format, providing clear and precise measurements. Its compact design ensures it can be integrated into control panels or instrumentation setups without occupying too much space.

How Does a 1/8 DIN Panel Meter Work?

A 1/8 DIN Panel Meter operates by receiving an analog signal from a sensor or transducer, such as a load cell, strain gauge, or a microvolt signal source. Here's a step-by-step overview of how this Panel Meter functions:

  1. Signal Acquisition:
    The Panel Meter receives an analog input signal from a connected sensor. Load cells, strain gauges, and other measuring devices output signals in varying ranges and formats.
  2. Signal Conditioning:
    The analog signal is conditioned to ensure it is within the operating range of the Panel Meter. This may involve amplification, filtering, or conversion to ensure accuracy.
  3. Analog-to-Digital Conversion:
    The conditioned analog signal is converted into a digital format using an Analog-to-Digital Converter (ADC). This step is crucial for achieving the high precision required in measurements.
  4. Display and Output:
    The digital signal is processed by the Panel Meter's internal circuitry and displayed on the Panel Meter's digital screen. Many Panel Meters also offer additional output options, such as analog output, relay outputs, or communication interfaces for integration with other systems.
  5. Calibration and Configuration:
    The Panel Meter can be calibrated to ensure accuracy and configured to suit specific measurement needs, including setting measurement ranges, units, and scaling factors.

Applications of a 1/8 DIN Panel Meter

  1. Load Cell Measurements:
    In industrial and laboratory environments, load cells are used to measure force, weight, or pressure. A 1/8 DIN Panel Meter provides a compact yet highly accurate means to display and monitor these measurements, ensuring precise control and feedback.
  2. Strain Gauge Monitoring:
    Strain gauges measure the amount of deformation or strain experienced by an object. A Panel Meter is used to monitor these measurements, which is critical in applications such as structural health monitoring, material testing, and mechanical systems analysis.
  3. Microvolt Measurements:
    For applications requiring ultra-sensitive measurements, such as scientific research and precision instrumentation, a 1/8 DIN Panel Meter can measure signals in the microvolt range. This capability is essential for detecting and quantifying very small electrical signals with high precision.
  4. General Industrial Use:
    Beyond specific sensors, this Panel Meter is widely used in various industrial settings for monitoring electrical signals, process control, and system diagnostics. Its compact size allows it to be integrated into tight spaces without compromising functionality.

Where Is a 1/8 DIN Panel Meter for Load Cells, Strain Gauges, and Microvolts Used?

A Panel Meter is crucial in various industries for monitoring and displaying measurements from different sensors. Among these, a 1/8 DIN Panel Meter is widely used due to its compact size and versatility. When paired with load cells, strain gauges, or microvolt sensors, this Panel Meter plays an essential role in many applications.

  1. Industrial Weighing Systems
    One of the most common applications of a 1/8 DIN Panel Meter is in industrial weighing systems. Load cells, which convert a force into an electrical signal, are widely used in scales and weighing systems. The Panel Meter reads the low-level signal from the load cell, amplifies it, and displays the weight in real-time. This Panel Meter is found in a variety of industries, including manufacturing, agriculture, and logistics, where precise weight measurements are crucial for quality control, inventory management, and compliance with regulations.
  2. Material Testing and Research Laboratories
    In research laboratories and material testing facilities, strain gauges are often used to measure the deformation or strain of a material under load. These sensors output a very low voltage signal, often in the microvolt range, which is where a 1/8 DIN Panel Meter excels. The Panel Meter accurately captures and displays these minute changes, allowing researchers to analyze material properties such as tensile strength, elasticity, and fatigue. This application is critical in developing new materials and ensuring that they meet stringent performance standards.
  3. Automation and Process Control
    In automation and process control environments, precise measurement and feedback are essential for maintaining operational efficiency. Load cells and strain gauges are often integrated into automated systems to monitor forces, weights, and tensions in real-time. A 1/8 DIN Panel Meter is used in these systems to provide operators with clear, immediate feedback, enabling quick adjustments and ensuring that processes remain within desired parameters. This Panel Meter is especially valuable in industries like automotive manufacturing, where precision is key to product quality and safety.
  4. Aerospace and Defense
    The aerospace and defense sectors demand high precision and reliability, particularly in testing and monitoring applications. Load cells and strain gauges are frequently used in these industries to test the structural integrity of components under various conditions, including extreme forces and temperatures. A 1/8 DIN Panel Meter is used to measure and display the outputs of these sensors, ensuring that data is accurate and readily available. This information is vital for validating the performance and safety of aircraft, spacecraft, and defense systems.
  5. Energy and Power Generation
    In the energy sector, particularly in power generation and distribution, strain gauges and load cells are used to monitor the mechanical forces in turbines, generators, and other equipment. The signals generated by these sensors are typically in the microvolt range, making a 1/8 DIN Panel Meter ideal for capturing and displaying this data. Accurate measurement of these forces is crucial for maintaining equipment efficiency, preventing failures, and ensuring the continuous, reliable supply of energy.
  6. Medical Devices and Health Monitoring
    Precision is also vital in medical devices and health monitoring systems, where load cells and strain gauges are used in applications such as patient monitoring equipment, prosthetics, and surgical instruments. A 1/8 DIN Panel Meter is employed to display the low-voltage signals from these sensors, providing healthcare professionals with accurate and immediate feedback. This application is critical for patient safety and the effective functioning of medical equipment.

Conclusion

A 1/8 DIN Panel Meter is a versatile and essential tool in various industries where load cells, strain gauges, and microvolt sensors are used. From industrial weighing systems and automation to aerospace and medical applications, this compact Panel Meter provides precise and reliable measurement, ensuring that critical processes and systems operate efficiently and safely.

Load Cell, Strain Gauge & Microvolt Panel Meter Frequently Asked Questions

What is a zero balance specification, and why does it matter for a load cell Panel Meter?

Zero balance is the small residual output voltage a load cell produces with no weight applied, expressed in mV/V, and every load cell's calibration certificate lists an expected zero balance value. Comparing the meter's actual reading against that certificate value with the load cell unloaded is a standard way to confirm the load cell and its wiring are still functioning as originally calibrated.

What excitation voltage should be used when connecting a load cell to this Panel Meter?

Most load cells specify a recommended excitation voltage, commonly 5V or 10V DC, and using a stable, adequate excitation source — generally at least 10 volts is recommended for best results on many load cells — helps ensure the strongest, most stable output signal for the meter to read.

Can this Panel Meter distinguish between a genuine weight change and thermal drift?

The meter itself reads whatever voltage the load cell presents, so it can't distinguish thermal drift from a real load change on its own — that's why load cells intended for outdoor or variable-temperature environments should include their own temperature compensation, and periodic re-zeroing helps catch drift before it's mistaken for an actual reading change.

Does moisture ingress affect the Panel Meter, the load cell, or both?

Moisture problems most commonly originate at the load cell or its junction box rather than the meter itself, since that's where sealed enclosures are most likely to degrade over time from wash-down cycles or humidity. A meter reading that drifts or behaves erratically should prompt an inspection of the load cell's seal and junction box connections before the meter is assumed to be at fault.

Can this Panel Meter be scaled for load cells with different mV/V sensitivities?

Yes. The meter is typically field-scalable to match whatever sensitivity a specific load cell is rated for, so the same physical meter can be reconfigured for a different load cell's output characteristics rather than requiring a dedicated meter per sensitivity class.

What input resistance value would indicate load cell damage rather than a wiring issue?

Input or output resistance measured well above the load cell's rated value — often cited as a rough threshold above roughly 3 kΩ — is commonly associated with damage from an electrical surge or lightning strike, whereas a resistance close to the calibration sheet's expected value generally points away from that kind of damage.

Is isolation important between the load cell input and this Panel Meter's other connections?

Isolated input configurations are commonly available and help protect the sensitive low-level load cell signal from noise introduced by relays, analog outputs, or communication activity elsewhere in the same meter or panel.

Can this Panel Meter support more than one load cell feeding into a single weight reading?

A single meter input reads one combined bridge signal, so multiple load cells supporting the same platform or vessel are typically summed together through a junction box first, rather than being wired individually into separate meter inputs.

What alarm and output options does this Panel Meter offer for load cell applications?

These meters commonly support programmable high/low alarm relays, an isolated analog retransmission output, and serial communications such as RS-232 or RS-485, letting a weight or force reading trigger a local alarm or feed a PLC or data logging system.

How often should a load cell system be recalibrated once installed with this Panel Meter?

Recalibration frequency depends on the application's precision requirements and environmental conditions, but periodic verification against a known reference weight or signal is standard practice, since even a properly functioning system can drift gradually over time due to mechanical wear, temperature cycling, or connector degradation.

Panel Meter Load Cell Questions From the Field

My weighing system's readings drift, but I already replaced the load cell and the problem is still there — what am I missing?

This has been documented as a genuinely common field mistake — a technician replaces the more expensive, obvious suspect (the load cell) while the actual cause turns out to be something small and inexpensive nearby, such as a failed seal on a junction box letting in condensation and causing an intermittent short. A methodical inspection — starting with a visual check of every connection and enclosure before assuming the load cell itself is at fault — catches this class of problem faster than replacing parts based on assumption.

Why does my scale read differently depending on the time of day or the weather?

This pattern is frequently traced to thermal effects rather than an actual load or wiring problem — temperature swings between cold nights and direct sunlight (or heat from nearby machinery) cause the strain gauge material to expand and contract, which can shift the zero point or introduce output instability even with nothing changing about the actual load. Shielding the load cell from direct sun or heat sources, and using temperature-compensated load cells where wide swings are unavoidable, are the standard mitigations.

When multiple load cells support the same platform, how do I know if one of them is carrying more than its fair share of the load?

Field guidance recommends verifying that each load cell in a multi-cell system is carrying a roughly equal share of the total load, since an uneven distribution — from an unlevel platform, a partially obstructed load path, or mechanical binding — produces inaccurate total readings even if every individual load cell is functioning correctly. Checking individual cell outputs against each other under a known test load helps confirm the load is actually being shared as intended.

How do I test a load cell's health without disconnecting it from the meter or junction box?

A documented electrical test approach is to individually check each strain gauge's resistance against the load cell's wiring diagram, and separately check the input/output resistance against the calibration sheet's expected value — significant deviations at any of these test points help pinpoint whether the issue is within the strain gauge array itself versus elsewhere in the system, without needing to physically remove the load cell.

Why does my Panel Meter show a value even when there's genuinely nothing on the scale?

A nonzero reading with no load applied is generally a zero balance or zero shift issue — comparing the current reading against the load cell's original calibration certificate value for zero balance clarifies whether this is expected sensor characteristic or a real shift, and a documented cause of unexpected zero shift is the load cell having been overloaded or subjected to a shock load at some point, which can permanently alter its zero point even without visible physical damage.

Should I be concerned about a load cell cable that runs near other cables or equipment?

Yes — cables and connectors are noted as being temperature and interference sensitive in their own right, separate from the load cell element itself, so routing load cell cabling away from heat sources and sources of electrical interference is a standard preventive step rather than something to address only after a problem appears.

My load cell has been in continuous service for years — should I expect its accuracy to degrade even without any obvious incident?

Yes, gradual accuracy loss over time is a documented and expected phenomenon even without a specific incident, driven by ongoing mechanical and environmental stress on the sensor. Regular testing against known reference weights (or a documented multimeter-based test method) is the recommended way to catch this kind of slow drift before it becomes significant enough to affect operations.

Can a load cell that's been overloaded still pass a basic zero balance check, or would that always show up immediately?

Not necessarily — overload damage doesn't always show up as an obvious symptom immediately, and changes in zero balance are one of the more commonly documented consequences of prior overload or shock, but the load cell may otherwise continue functioning in a way that seems normal day-to-day. This is part of why periodic verification against the original calibration certificate, rather than just watching for gross malfunction, is recommended even for load cells that "seem fine."