New Front Panel USB-C Port Coming Soon!
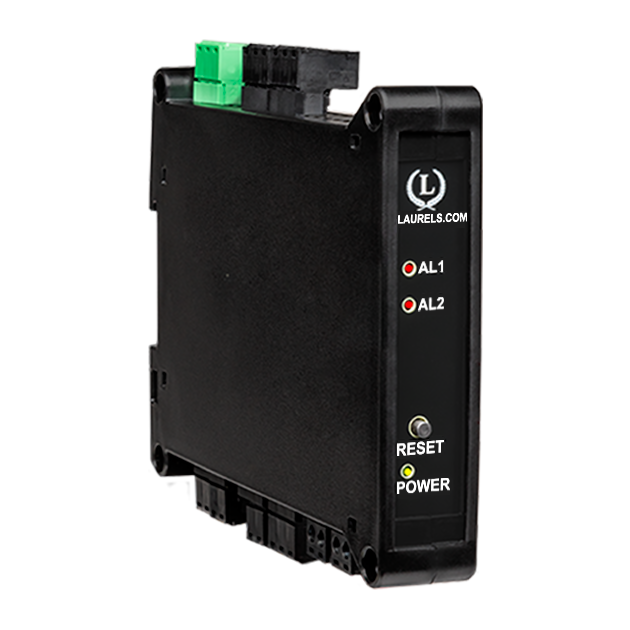
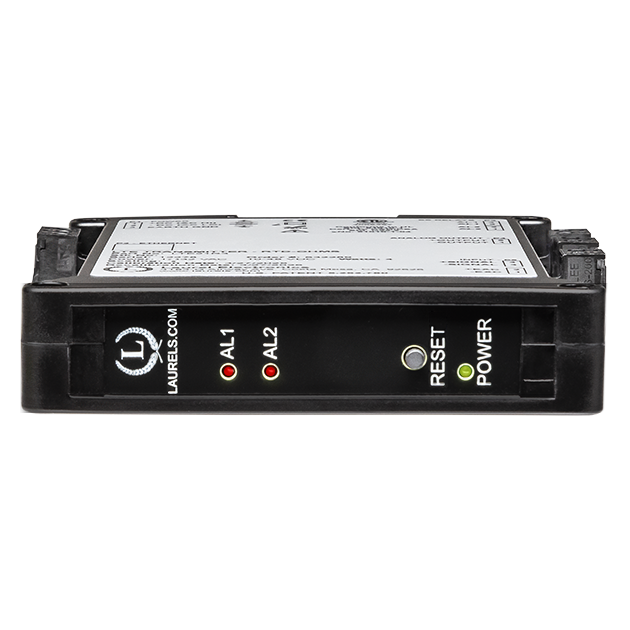
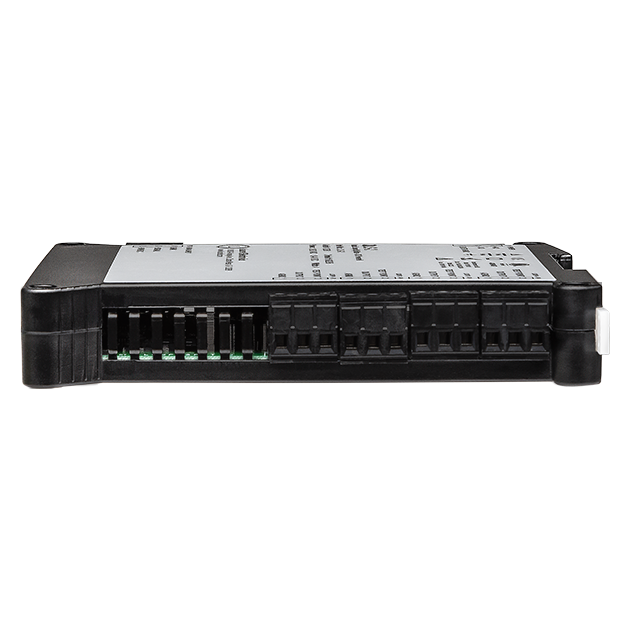
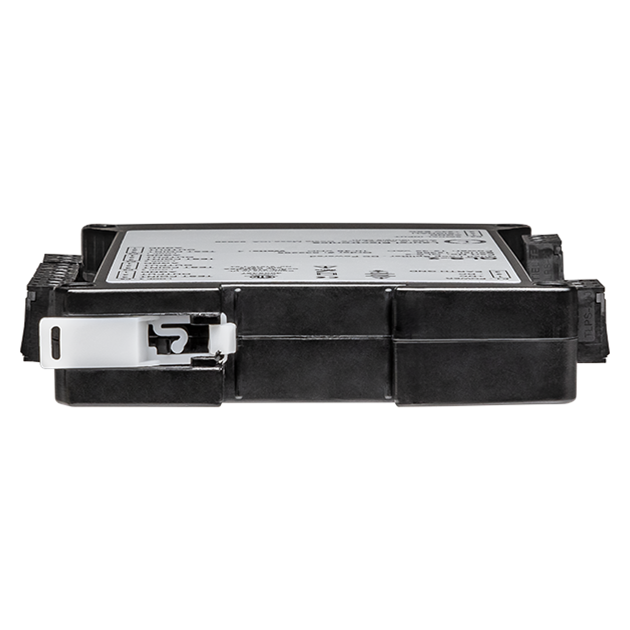
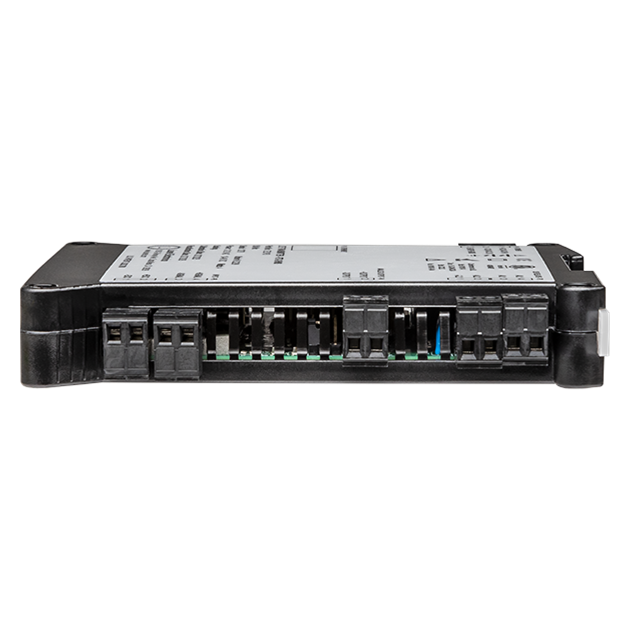
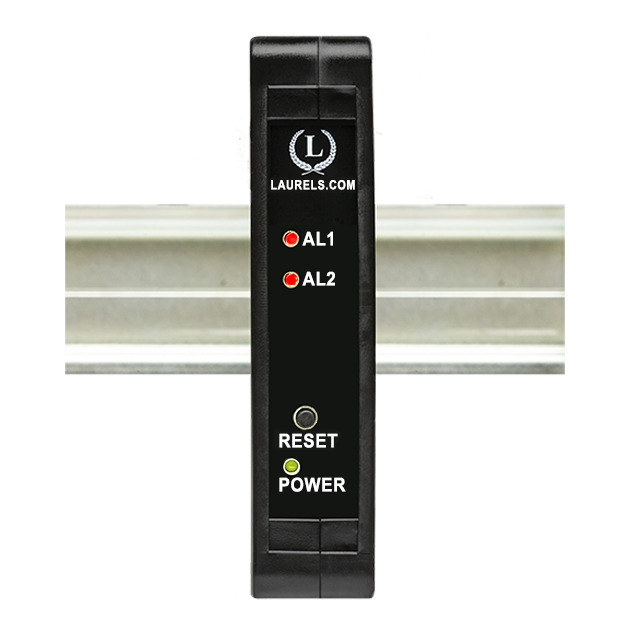
The Laureate 4-20 mA, 0-20 mA, 0-10V or -10V to +10V and RS232/RS485 output transmitter for load cell or microvolt input is designed for use with load cells, strain gauges and microvolt input signals where exceptional sensitivity and stability are required. A most sensitive full-scale input range ±20 mV can be scaled internally to ±99,999 counts. The selected input range for the full 0-20 mA output span can be as wide as ±99,999 counts or as narrow as 150 counts, limited only by considerations of electrical noise and time constants of the programmable moving average digital filter. The unit's serial data is accurate to ±0.01% of reading ±2 counts in ratiometric load cell mode and ±0.01% of full scale in ±2 counts in absolute microvolt mode.
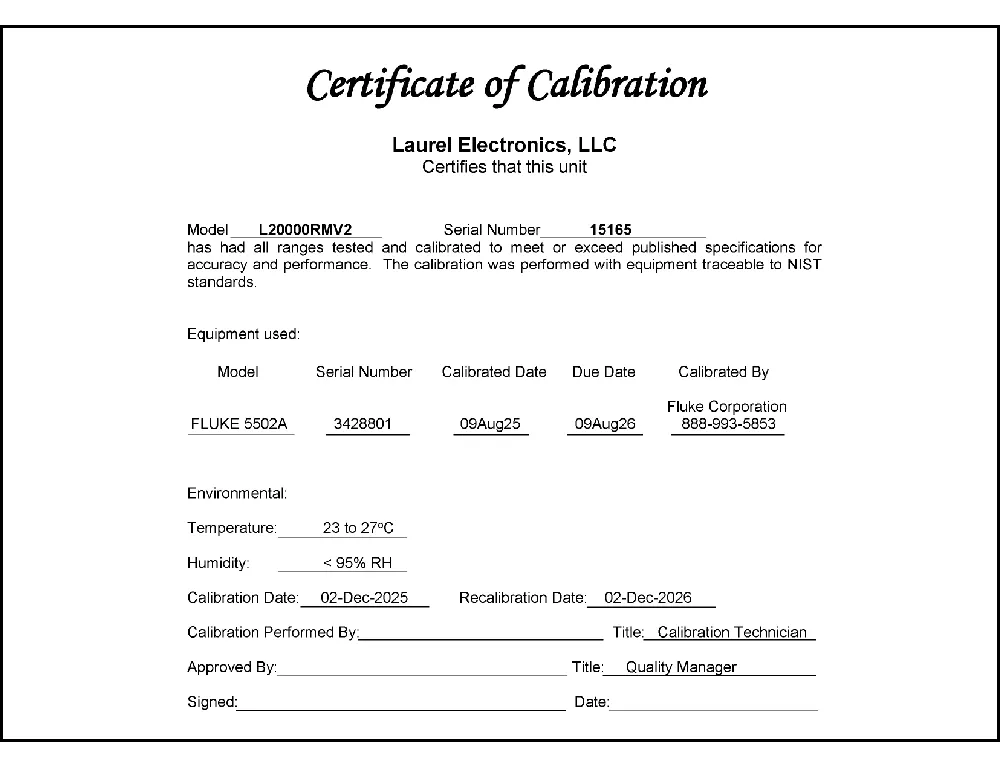
All signal conditioner board ranges are factory-calibrated, with calibration factors for each range securely stored in an onboard EEPROM. These factors can be scaled via software to accommodate external shunts, enabling field replacement of signal conditioner boards without necessitating recalibration of the associated transmitter. For optimal accuracy, factory recalibration is recommended annually. All Laurel Electronics instruments undergo factory calibration using the industry-leading Fluke calibrators, which are recalibrated yearly and certified traceable to national standards, ensuring the highest level of precision and reliability.
The optional extended Laureate computer board enhances Laureate transmitter by displaying rates derived from successive readings and enabling highly accurate custom curve linearization. For example, it can calculate liquid volume or flow rate in a horizontal cylindrical tank using levels from a 4-20 mA transmitter. Setup is straightforward: users input up to 180 data points into a spreadsheet or text file, and the computer calculates spline-fit segments, which are then downloaded to the transmitter for precise operation.
Easy USB-C Programming: Configure a Laureate transmitter through the front-panel USB-C port with Laurel’s free Instrument Setup Software for Windows. Configurations can be saved to the transmitter, a PC, a file server, or a USB thumb drive. Laurel’s free Instrument Setup Software can also be used for light-duty data collection.
High read rate of up to 50 or 60 conversions per second, the Laureate™ LT Series transmitter uses Concurrent Slope (US Pat. 5,262,780) analog-to-digital conversion to integrate signals over a full power line cycle (50 Hz or 60 Hz). This read rate enables peak and valley capture, real-time computer interfacing, and control applications. Peak and valley values are automatically captured and can be viewed using Laurel’s free Instrument Setup Software (compatible with Windows PCs) or transmitted as serial data.
Two tare functions: auto-tare and manual tare. In auto-tare, an input line is grounded by an external pushbutton. This causes the current weight, which is normally the empty weight of the container to be stored in memory as an offset. In manual tare, the tare value can be entered manually via a control input pushbutton or using Laurel's free Instrument Setup Software.
Peak and valley values are automatically captured. These may be displayed via Laurel's free Instrument Setup Software, which runs on a PC under MS Windows or can be transmitted as serial data.
Two control inputs (CMOS/TTL levels, logic 0 = tied to digital ground, logic 1 = open) or dry contacts that can be set to control / activate 14 transmitter commands.
An (isolated) 5, 10, 12, or 24 Vdc excitation output is standard to power transducers or two-wire transmitters. Ratiometric operation, which automatically compensates for changes in the applied excitation, is jumper selectable for applications, such as bridges, where the signal to be measured is proportional to the excitation level.

LT series DIN rail Transmitters & signal conditioners can be interfaced to a wide range of sensors and transducers using one of seven available plug-in signal conditioner boards. The transmitters duplicate the high performance (high accuracy and high read rate) and extensive programmable features of Laureate 1/8 DIN digital panel meters, counters, and timers. They utilize the same signal conditioners boards, much of the same firmware, and Laurel's free Windows-based Instrument Setup Software. They come in a compact DIN rail mount package with detachable screw-clamp connectors for easy wiring.
The LT series Transmitters feature isolated, user-selectable analog outputs (4-20 mA, 0-20 mA, 0-10V, or -10V to +10V), an RS232 or RS485 serial data interface, and dual 120 mA solid state AC/DC relays. Most models, except those with temperature or AC RMS signal conditioners, include an isolated 5, 10, 12, or 24 Vdc transducer excitation output.
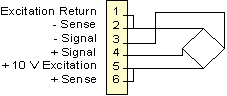 |
In 4-wire connection, the excitation and sense lines are tied together. The transmitter can make ratiometric corrections for supply voltage variations, but does not compensate for variations in lead resistance. This connection is often used with short cable runs. |
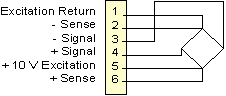 |
In 6-wire connection, the sense lines are separate from the excitation lines, thereby eliminating effects due to variations in lead resistance. This allows long cable runs in outdoor environments with temperature extremes. |
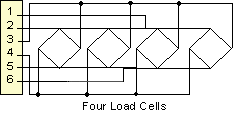 |
For large scales, up to four 350 ohm load cells can be powered by a single Laureate, whose excitation output is rated 120 mA at 10V. The excitation and sense points of the four bridges are connected in parallel. The load cell outputs will be averaged if the load cells have the same sensititivity in mV/V. |
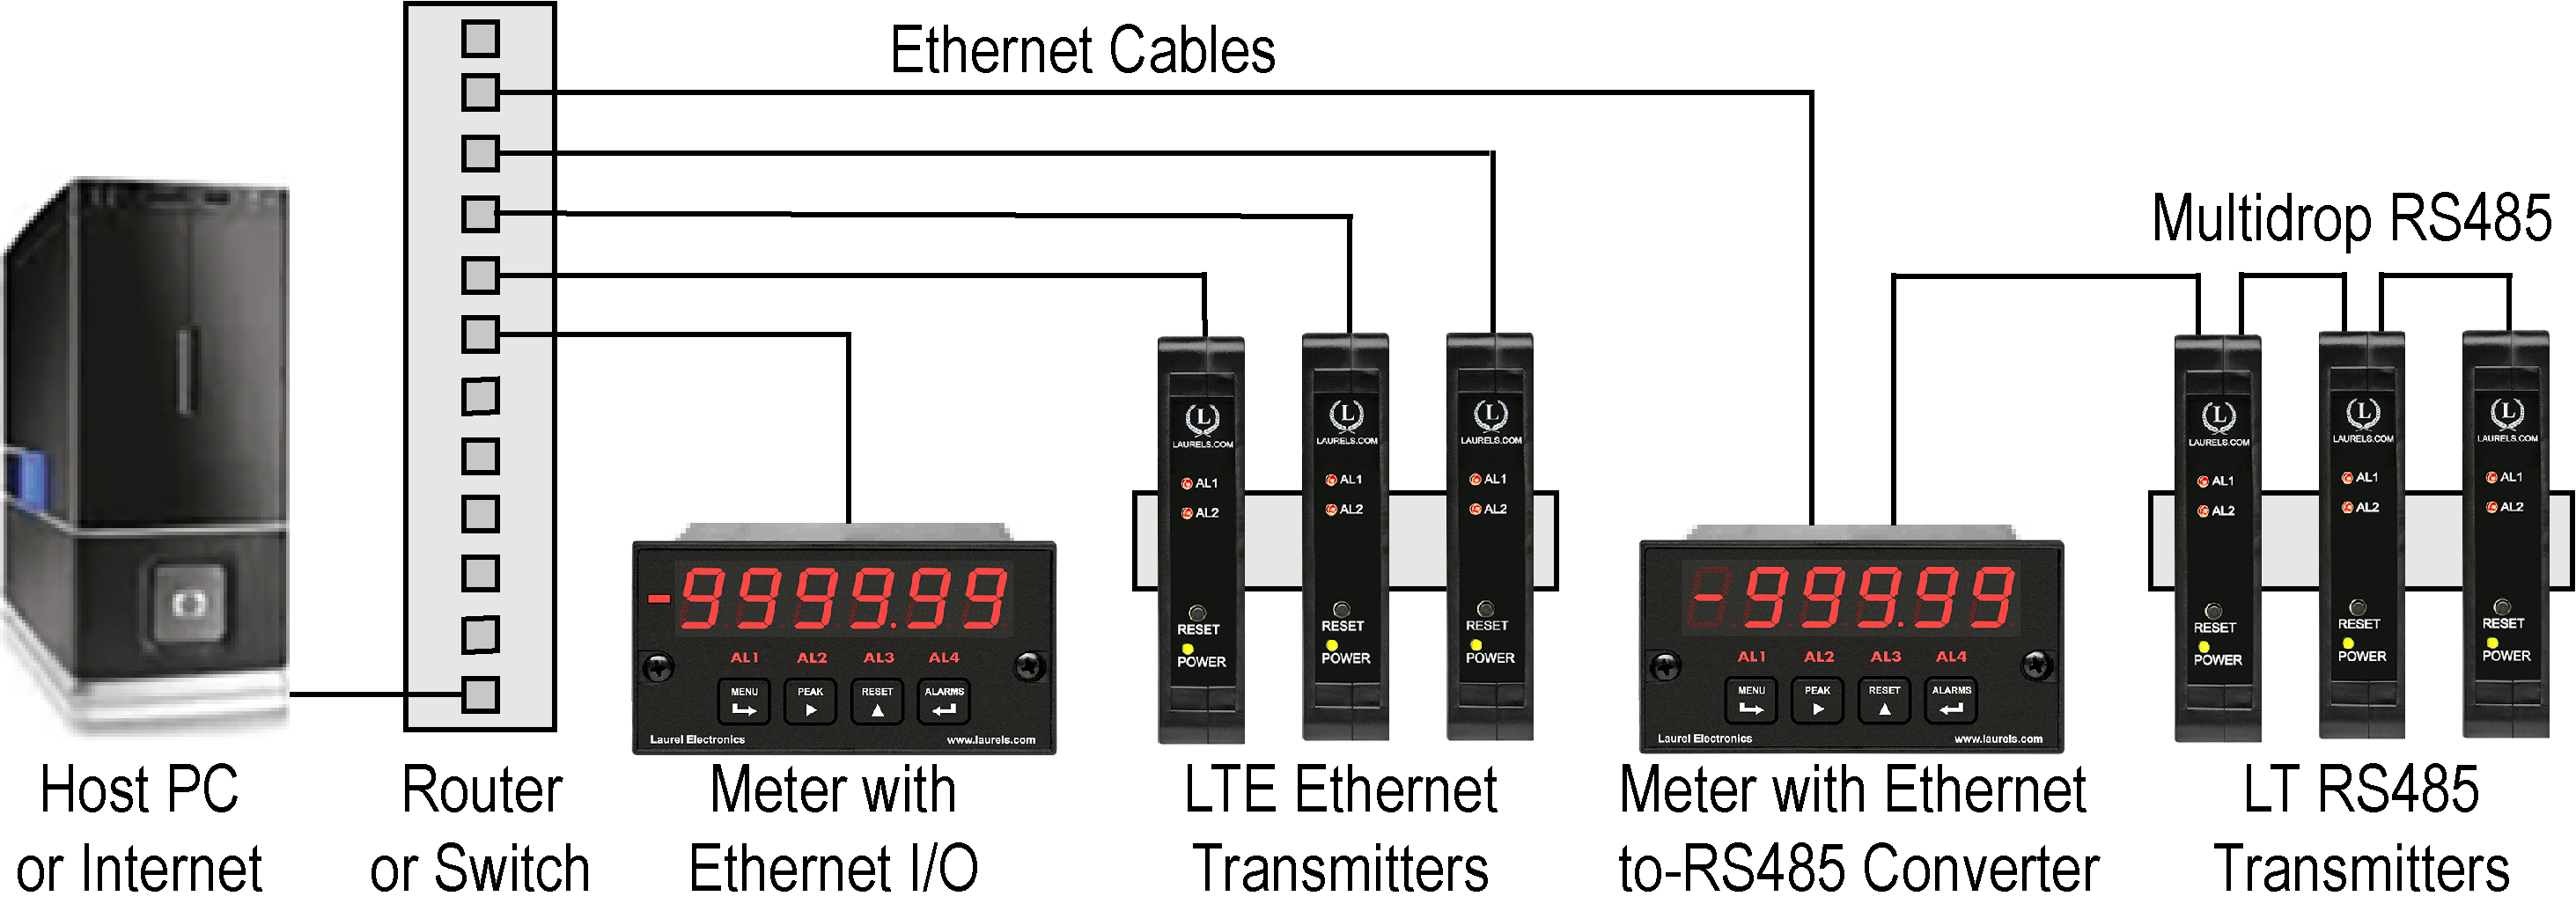
Up to 30 Laureate LT Transmitters and/or Digital Panel Meters can be configured for RS485 and daisy-chained to an LT Transmitter for seamless LAN integration. Alternatively, Laurel LTE series Ethernet transmitters can connect directly to a LAN via an Ethernet cable. Setup for both configurations is streamlined using Laurel’s free Instrument Setup Software, which simplifies node discovery and transmitter configuration.
Laureate Transmitters can be equipped with Laurel communication boards to support various interfaces and protocols. These include serial interfaces with ASCII or Modbus RTU protocols, and Ethernet interfaces with web access, ASCII, or Modbus TCP/IP protocols, ensuring versatile connectivity for your commercial applications.
| LT Transmitter Signal Input & Function | Model Series | Analog Output | RS232 & RS485 | Dual Relays | |
|---|---|---|---|---|---|
| 1 | DC Input Voltage and Current | LT-DC |  |
|
|
| 2 | AC RMS Voltage or Current | LT-RMS | |
|
|
| 3 | Process Voltage or Current | LT-P | |
|
|
| 4 | Weighing Applications | LT-WA | |
|
|
| 5 | Load Cell & Microvolt Signals | LT-WM | |
|
|
| 6 | Thermocouple (Types J, K, T, E, N, R, S) | LT-TC | |
|
|
| 7 | RTD Temperature | LT-RTD | |
|
|
| 8 | Resistance in Ohms | LT-R | |
|
|
| 9 | Frequency, Rate, Speed | LT-FR | |
|
|
| 10 | Pulse Input Totalizer | LT-FR | |
|
|
| 11 | Process Signal Totalizer | LT-VF | |
|
|
| 12 | Sum, Difference, Ratio, Product of 2 Inputs | LT-FR | |
|
|
| 13 | Batch Controller Pulse Input | LT-FR | |
|
|
| 14 | Batch Controller Analog Input | LT-FR | |
|
|
| 15 | On/Off Duty Cycle | LT-FR | |
|
|
| 16 | Stopwatch Timing for Single Events | LT-FR | |
|
|
| 17 | Average Time of Periodic Events | LT-FR | |
|
|
| 18 | AC Phase Angle and Power Factor | LT-FR | |
|
|
| 19 | Quadrature Position or Rate | LT-QD | |
|
|
| Analog Input | Range | Scaling | Input Ohms | Error at 25°C |
|---|---|---|---|---|
| Load Cell Input | ±20.000 mV | -99,999 to +99,999 zero adjust. 0 to ±99,999 span adjust. |
1 GΩ | ±0.01% of rdg ± 2 cts |
| ±50.0000 mV | ||||
| ±100.00 mV | ||||
| ±250.00 mV | ||||
| ±500.00 mV | ||||
| Microvolt Input | ±20.000 mV | 1 µV | 1 GΩ | ±0.01% of FS ± 2 cts |
| ±50.0000 mV | 2.5 µV | |||
| ±100.00 mV | 5.0 µV | |||
| ±250.00 mV | 12.5 µV | |||
| ±500.00 mV | 25 µV | |||
| Reading Resolution | 16 bits (65,536 steps) | |||
| Reading Accuracy | ±0.01% of reading ± 2 counts in ratiometric mode, ±0.01% of full scale ± 2 counts in absolute mode |
|||
| Update Rate, Max | 50/sec at 50 Hz, 60/sec at 60 Hz | |||
| Max applied voltage | 100 V | |||
| Recalibration: All ranges are calibrated at the factory. Recalibration is recommended every 12 months. | ||||
| A-to-D Conversion | ||||
| Technique | Concurrent Slope™ (Pat 5,262,780) | |||
| A-to-D rate | 60/s at 60 Hz, 50/s at 50 Hz | |||
| Output update rate | 56/s at 60 Hz, 47/s at 50 Hz | |||
| Display update rate | 3.5/s at 60 Hz, 3/s at 50 Hz | |||
| Accuracy | ||||
| Error at 25°C | 0.01% FS ± 2 counts (except 5A range) | |||
| Span tempco | 0.003% of reading/°C | |||
| Zero tempco | 0.1 count/°C | |||
| Noise Rejection | ||||
| CMR, DC to 60 Hz | 130 dB | |||
| NMR at 50/60 Hz | 90 dB with min filtering | |||
| Analog Output (standard) | ||||
| Output Levels | 4-20 mA, 0-20 mA, 0-10 Vdc, -10 to +10Vdc (user selectable) | |||
| Compliance, 4-20 mA | 10V (0-500Ω load) | |||
| Compliance, 0-10V | 2 mA (5 kΩ load or higher) | |||
| Output Resolution | 16 bits (65,536 steps) | |||
| Output Accuracy | 0.02% of output span plus conversion accuracy | |||
| Output Isolation | 250V rms working, 2.3 kV rms per 1 minute test | |||
| Excitation Output (standard) | ||||
| 5 Vdc | 5 Vdc ± 5%, 100 mA (jumper selectable) | |||
| 10 Vdc | 10 Vdc ± 5%, 120 mA (jumper selectable) | |||
| 12 Vdc | 12 Vdc ± 5%, 100 mA (jumper selectable) | |||
| 24 Vdc | 24 Vdc ± 5%, 50 mA (jumper selectable) | |||
| Output Isolation | 50 Vdc from signal ground | |||
| Ratiometric operation | Automatically compensates for changes in excitation level. | |||
| Dual Relay Output (standard) | ||||
| Relay Type | Two solid state relays, SPST, normally open, Form A | |||
| Load Rating | 120 mA at 140 Vac or 180 Vdc | |||
| Serial Data Output (standard) | ||||
| Signal Types | RS232 or RS485 (half or full duplex), jumper selectable | |||
| Data Rates | 300, 600, 1200, 2400, 4800, 9600, 19200 baud | |||
| Output Isolation | 250V rms working, 2.3 kV rms per 1 min test | |||
| Serial Protocols | Modbus TCP, Modbus RTU, Modbus ASCII, Laurel ASCII | |||
| Modbus Compliance | Modbus over Serial Line Specification V1.0 (2002) | |||
| RS232/485 Connector | Screw terminals for easy daisy chaining | |||
| Digital Addresses | 247 for Modbus, 31 for Laurel ASCII | |||
| Power Input | ||||
| Standard Power | 85-264 Vac or 90-300 Vdc | |||
| Low Power Option | 10-48 Vdc or 12-32 Vac | |||
| Power Frequency | DC or 47-63 Hz | |||
| Power Isolation | 250V rms working, 2.3 kV rms per 1 min test | |||
| Power Consumption at 24V | 1.5W typical, 3W with maximum excitation output | |||
| Environmental | ||||
| Operating Temp. | -40°C to 70°C (-40°F to 158°F) | |||
| Storage Temp. | -40°C to 85°C (-40°F to 185°F) | |||
| Relative Humidity | 95% at 40°C, non-condensing | |||
| Cooling Required | Mount transmitters with ventilation holes at top and bottom. Leave 6 mm (1/4") between transmitters, or force air with a fan. | |||
| Mechanical | ||||
| Enclosure | Rugged black polycarbonate housing material | |||
| Mounting | 35 mm rail per DIN EN 50022 | |||
| Dimensions | 129 x 104 x 22.5 mm case | |||
| Connectors | Detachable screw-clamp connectors for signal and power RJ45 jack for Ethernet | |||
| Tightening Torque | Screw terminal connectors: 5 lb-in (0.56 Nm) | |||
| Weight | Complete transmitter: 183 g (6.5 oz) | |||
| Replacement Case Screws | ||||
| Size | 6 | |||
| Thread Pitch | 6-19 | |||
| Length | 1/2" | |||
| Head Style | Pan Head | |||
| Drive Style | Phillips | |||
| Head Diameter | 0.256-0.270 | |||
| Head Height | 0.087-0.097 | |||
| Full/Partial Thread | Full | |||
| Drive Size | 2 | |||
| Material | Steel | |||
| Finished | Black Oxide | |||
| General | ||||
| Programming | Utilize Laurel's free Instrument Setup Software, which runs on a PC under MS Windows. | |||
| Security | Lockout options available using Laurel's free Instrument Setup Software. | |||
| Warranty | 3 years parts & labor | |||
| Recalibration: All ranges are calibrated at the factory. Recalibration is recommended every 12 months. | ||||
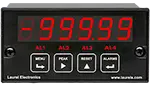
|
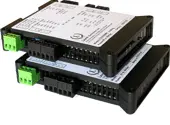
|
| 1/8 DIN Digital Panel Meters | DIN Rail Transmitters |
Free Downloadable Windows-based Instrument Setup (IS) software (Data Interface Board Required) for use with our programmable Digital Panel Meters, Scale Meters, Counters, Timers, Remote Displays, and Transmitters, are an easy method to set up Laureate 1/8 DIN digital panel meters, counters, timers, remote displays, and DIN-rail transmitters, as explained in the Instrument Setup Software Manual. Laureate 1/8 DIN instruments can also be set up from the front panel, as explained in their respective Owners Manuals. Instrument Setup software is of benefit whether or not the PC is connected to the instrument.
Set User Account Control (UAC) of MS Windows to "Never notifiy me" so that Instrument Setup Software can create directories. The UAC change screen can be reached as follows:
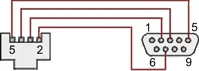
RJ11-to-DB9 cable with rear view of DB9 connector to PC
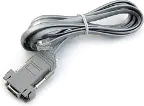
RS232 cable, meter to PC, P/N CBL01
Laureate 1/8 DIN Laureate instruments must be equipped with a serial communications board and be connected to the computer via a serial communications cable. The connection can be via RS232, RS485, USB or Ethernet. Following setup, the serial communications board may be removed from the instrument if desired. The wiring of the RS232 cable is illustrated above with end views of the two connectors.
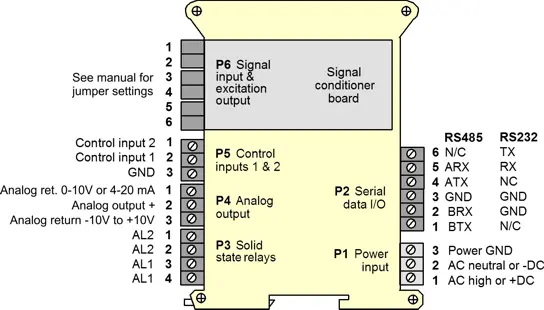
Laureate LT Series transmitters come standard with a 3-wire serial interface, which can be jumpered for RS232 or RS485.
Laureate LTE Series transmitters come standard with an Ethernet interface.
Click on any of the reduced screens below for a full-size screen view, then click on the Back button of your browser to return to this page. The screens examples below are for a fully-loaded Series 2 Digital Panel Meter (DPM), which is connected to the PC via RS232. If the meter is a Series 1 meter (pre-2007), this is sensed by the software, and somewhat different screens are brought up. Please see Series 1 setup screens.


From the Main Menu, click on Readings if your PC is connected to the meter. A pull-down menu then offers three choices: List, Plot and Graph.


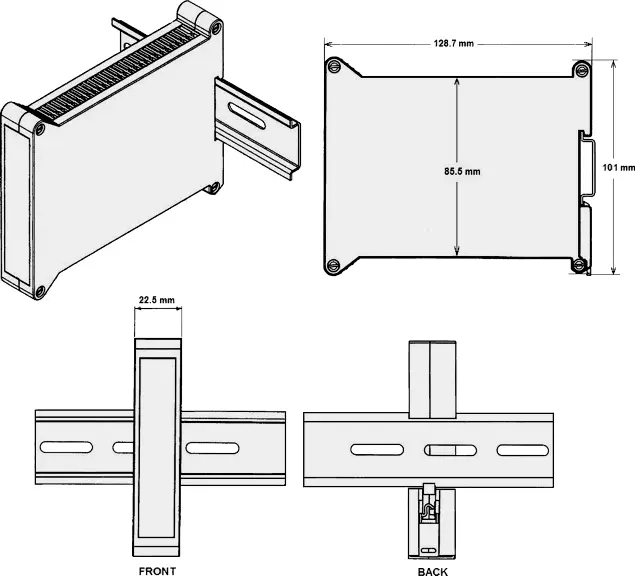
Dimensioned CAD assembly drawings in EPRT, STEP, x_t, .dwg, pdf file formats: Laureate-transmitter-case.zip (zipping prevents browser from opening CAD files as text files).
CAL-Analog
Certificate of Calibration
$65.00DLS-XLOG2
XLog2 Data logging Software
$495.00CON01
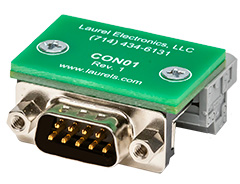
CON01 Connector
$75.00CBL6
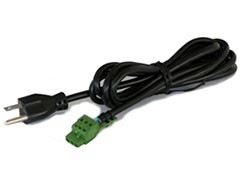
6-foot Power Cable
$41.00CBL12
12-foot Power Cable
$47.00CBL02
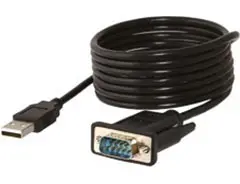
USB-to-RS232 Adapter Cable
$47.00CBL04
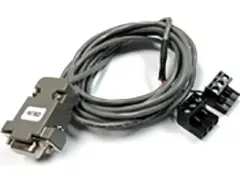
RS232 Cable for LT Transmitters
$47.00In the field of industrial automation and instrumentation, accurate measurement and signal handling are vital. A key device in this sector is the analog transmitter, particularly when managing inputs from load cell strain gauges. This section offers a detailed examination of the LT DIN Rail Analog Transmitter, focusing on its purpose, practical uses, and integration with load cells via serial data communication and analog outputs.
The LT DIN Rail Analog Transmitter is a specialized tool engineered to transform faint microvolt signals from load cell strain gauges into reliable, usable analog and digital outputs. These transmitters are typically mounted on DIN rails, which are standardized metal supports designed to simplify the installation of industrial control equipment in electrical enclosures.
LT DIN Rail Analog Transmitters are extensively utilized in industries where precise weight or force measurement is paramount. Notable applications include:
In industrial and scientific settings, accuracy and dependability are crucial, particularly when managing sensitive measurements from load cells and strain gauges. This section outlines the primary areas of use, highlighting its substantial impact across various sectors.
An LT DIN Rail Analog Transmitter with serial data communication and analog outputs is a cornerstone component in industrial automation, especially for handling low-level signals from load cell strain gauges. Its ability to enhance, convert, and transmit these signals ensures precise measurements throughout industrial processes, boosting operational effectiveness and accuracy — whether applied in manufacturing, process management, material evaluation, structural testing, energy management, or medical research. As the need for precision and reliability increases, the importance of these transmitters will continue to grow, driving technological and safety innovations across the automation systems that depend on them.
Ratiometric mode measures the signal relative to the transmitter's own excitation voltage, so small excitation fluctuations largely cancel out — this is the standard mode for most load cells. Absolute microvolt mode instead measures against a fixed internal reference, appropriate when the sensor's output isn't tied to the transmitter's excitation supply.
Ratiometric mode is specified as 0.01% of reading ±2 counts, while absolute mode is specified as 0.01% of full scale ±2 counts. The distinction reflects how each mode references its measurement: a reading-based percentage in ratiometric mode versus a fixed-scale percentage in absolute mode.
Up to four 350-ohm load cells can be wired in parallel to a single transmitter, sharing its excitation output (rated 120 mA at 10V). Their outputs are averaged together, provided the load cells have matching sensitivity in mV/V.
6-wire connections separate the sense lines from the excitation lines, eliminating the effect of lead resistance on the reading. This matters most on long cable runs or in outdoor installations with significant temperature swings, where 4-wire lead resistance effects would otherwise show up as measurement error.
Zero and span adjustment maps the raw input signal to a displayed and transmitted reading in whatever engineering units the application needs — zero can be set anywhere from -99,999 to +99,999, and span from 0 to ±99,999, independent of the physical mV input range selected.
No — the excitation output (5V, 10V, 12V, or 24V DC, jumper selectable) powers the load cell or sensor itself and carries its own isolation rating (50 Vdc from signal ground), while the analog output (4-20 mA, 0-20 mA, 0-10V, or -10 to +10V) is a separate, independently isolated retransmission of the measured value.
The specified maximum applied voltage on the load cell/microvolt input is 100V, which is a protection limit rather than an operating range — actual signal ranges top out at ±500.00 mV.
Yes — while weighing is the most common use, any sensor producing a millivolt-level ratiometric or absolute signal, such as certain pressure transducers or custom strain-based sensors, can be read by the same hardware, provided its output falls within the transmitter's supported ranges.
Auto-tare zeroes out the current reading (typically an empty container's weight) automatically when an external pushbutton grounds a designated input line. Manual tare instead lets a specific tare value be entered directly via a control input or Laurel's setup software.
Yes — up to 30 LT Transmitters and/or Digital Panel Meters can be daisy-chained on RS485 for LAN integration, or an LTE series Ethernet transmitter can be used for a direct Ethernet connection instead.
Slow drift with a genuinely stable load is commonly traced to temperature effects on the load cell or its cabling rather than the transmitter itself; correlating the drift against ambient temperature changes over the same period is a typical first diagnostic step.
Because this is a microvolt-level signal, it's highly sensitive to noise picked up by nearby cabling, especially with degraded shielding or a poor ground connection; checking cable shielding continuity and connector integrity is the standard first troubleshooting step.
The standard approach is to disconnect and test each load cell individually against a known reference load before reconnecting it to the parallel arrangement, since a single faulty or mismatched-sensitivity cell can distort the averaged reading in a way that's difficult to isolate once all four are summed.
A correct zero paired with an inaccurate span usually points to a span/scaling mismatch between the load cell's actual rated output and the value entered during setup, rather than a wiring fault, since a wiring problem would typically disturb the zero reading too.
Moving to 6-wire sensing changes how lead resistance is compensated, so a calibration performed under a 4-wire connection won't necessarily carry over correctly after rewiring to 6-wire; recalibrating after any wiring configuration change is the recommended practice.
Variable-frequency drives are a well-documented source of electrical noise that couples easily into low-level signal wiring; verifying proper shielding, grounding, and physical separation from the noise source is the standard remedy before suspecting a transmitter fault.
Yes — moisture ingress into a load cell body or its junction box is a commonly documented cause of erratic or drifting readings, since it can create unintended resistance paths across the bridge circuit; checking for condensation or water ingress is a standard step when a previously stable installation starts behaving erratically.